
How to Draw a Majestic Wolf Drawing With Step By Step
Learn how to create this spectacular balloon wolf drawing by following a step-by-step lesson from cool drawing ideas. At the same time, the final picture is very sophisticated it possible to address the process down to intuitive steps.
In the process, Hames uses a textured surface texture and retains construction and sketch marks to give the drawing a lot of life. Follow his lead, and the drawing balloon will be released to the surface instead of becoming stiff and lifeless.
While we all like to dive into drawing contours and fur, your drawing will be better if you take your time in the less romantic stages of construction in the early steps. It gives you a solid and accurate framework to build and is crucial to the success of the final drawing. Remember, don’t rush to get into detail.
Supplies Required
You can apply Hames’ example as a reference or find your wolf picture online through websites like Wikimedia Commons.
You will require a set of graphite pencils, an eraser, and a line drawing surface as far as supplies go. It also helps to have a small piece of 80 grit sandpaper and a paper towel available.
Preparation and Initial Construction
We have established the structure of the balloon drawing.
Before you start, you will need the proper ground on paper, board, or canvas. “Ground” is another name for support or surface for drawing.
Another excellent ground option is a thin plywood panel with two coats of latex paint applied with a brush or roller. Just sand it before you start. Otherwise, make a good-quality drawing paper or hot-pressed watercolor paper.
Start With Geometric Shapes
To start drawing the balloon, we need to establish the geometry of the form. Study the face of the wolf and subvert the structure into its simplest shapes.
Use lines in the center and neatly space all significant elements, including the eyes, nose, ears, head, and neck. Draw lightly and do not erase anything.
Clarifies Face Geometry
We are developing the geometry of the wolf face.
At this stage, we proceed to refine the geometry of the wolf face. Look for essential plane changes and areas of tone, outlining them with simple, light marks.
Also, add meaning and shape to outline further the wolf’s ears, eyes, and nose.
Shading With Powdered Graphite
The application of powdered graphite and suddenly the balloon begins to take place.
You can use your powdered graphite using 8B graphite sticks and 80 grit sandpaper.
The powdered graphite is applying to a paper towel. Two tones use at the top of the sketch: black on the nose and markings and one style in the middle of many others.
This mid-tone matches the shadows and carries textures and highlights, which will be applied later using selective demolition. When setting the middle tone, be careful to leave white from the paper. It represents broad strokes of highlights and white feathers.
You should still see much of the original sketch.
Start Drawing Wolf Feathers
The next step is to draw a wolf feather. Using a soft pencil (6B or softer) relies on dark details for the eyes and nose.
In lighter strokes, indicate the direction in which the feather lays around the wolf’s face. Using a painted rubber eraser, pick some of the highlights around the face in the same order as your pencil strokes.
If your initial background seems a little dark, pull some of that with an eraser as well.
Using paper towels and graphite, continue to darken some areas of the shadow on the right side of the tip and the face of the balloon. It was a great stage to darken her facial markings.
Adding Details to Your Wolf
Now it’s time to build on some of the details. Do this by darkening the facial markings and the dark fur around the wolf’s eyes and ears. Use an 8b pencil with a short stroke in the direction of feather growth. For example, in wolf ears, you will see short external strokes.
The texture of the fur along the right side of the face is developing at the same time. Notice the way the direction of the feathers changes from the beginning to the ruff.
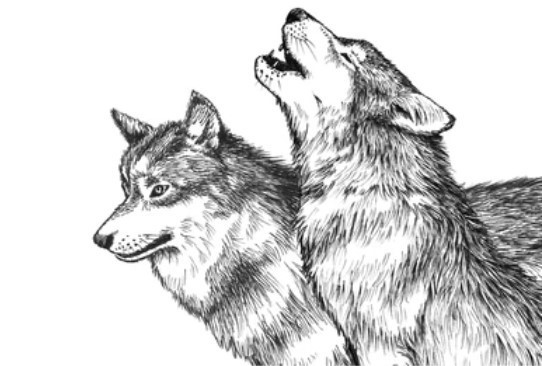
The Finished Wolf Drawing
To complete the balloon drawing, add some highlights and a whisker. Using a refill stick eraser (I like a product called Tuff Stuff, made by Sanford in the US), select the wolf fur highlights and re-work the direction.
Finally, there are light strokes and whiskers. We have it, a finished, full-tone graphite 3d drawing of an aristocratic balloon.


